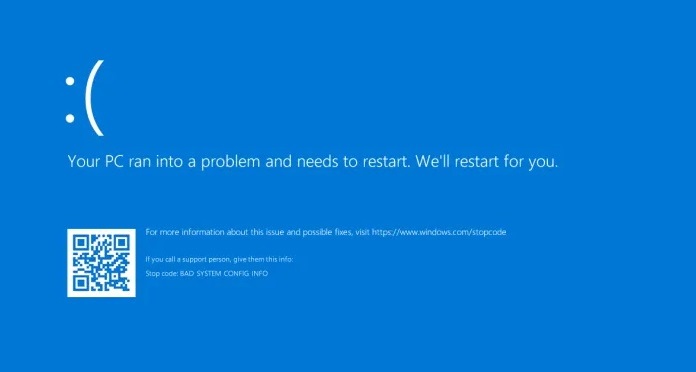
Wikism.info

How to Fix Getting Windows Ready, Don’t Turn Off Your Computer Error

December 21, 2022 By Alex Hep Leave a Comment

With the release of new versions of Windows, the installation process has grown easier. However, the installation does not always ensure that the computer will upgrade and perform properly.

When a user tries to turn on, turn off, or restart their computer or laptop, they generally get the Getting Windows Ready, Don’t Turn Off Your Computer problem.

The numerous solutions for the Getting Windows Ready, Don’t Turn Off Your Computer issue are listed below.

7 Solutions to the Error Getting Windows Ready, Don’t Turn Off Your Computer

Here are the 7 solutions which can help you get rid of the error Getting Windows Ready.

How To

Method 1: Simply Wat for Sometimes

Most pros advise users to simply wait until the line “Getting Windows Ready” appears on their system screen.

Your computer will download or install files and folders as well as perform certain background actions as a result of this.

The system takes time to complete the installation process. So, if a user wishes to restart his computer normally, experts usually recommend waiting no more than 2 to 3 hours.

Solution 2: Turn off the Computer and Restart it.

To power reset your computer, clear all of the information in the memory of your computer without affecting the data saved on it.

This solution assists the user in resolving different corruption issues that may arise on your system, as well as the error of Don’t turn off the computer while you’re Getting Windows Ready. To accomplish this, the user must take the following steps –

The first step is to shut down the computer.

Step 2: Disconnect all of your devices, including headphones, USB flash drives, and so on.

Step 3: Then, for at least 30 seconds, press and hold the power button.

Step 4: Finally, unplug the computer’s power line.

Step 5: Finally, unplug the computer’s power battery.

Step 6: Replace the battery and reconnect the power cable to your computer.

Step 7: Finally, switch on the computer, and if this solution succeeded, the user will not see the screen this time when it turns on.

Following the methods below, the user can delete the files that are causing the problem –

Step 1: Restart your machine to bring up the Windows boot options page.

Step 2: Select troubleshoot, advanced option, and command prompt from the Windows Boot options menu.

Step 3: Finally, type the command on the command line and press enter.

Step 4: Using the command prompt, locate the indicated location and use the delete command to delete the file that is causing the problem.

Method 3: Restore the System or Retrieve the System Image

The instructions below will walk you through how to do a system restore.

Step 1: Select the options to troubleshoot, advanced options, and then the system restore option from the Windows boot options menu.

Step 2: Next, follow the wizard’s directions to select the appropriate restoration point.

Step 3: Finally, to restore the system, click the Finish option.

Method 4: Run the System File Checking as a Last Resort

The system file checker is a tool for resolving the issue of “Getting Windows Ready.” When Windows reboots, it may need to prepare for an update, which is caused by corrupted files on your machine.

The steps for repairing the damaged files are as follows –

Step 1: The user must first insert the disc or USB drive into the drive and boot it from there.

Step 2: Next, select Repair your computer from the drop-down menu and select Screen. From there, select Troubleshoot from the drop-down menu.

Step 3: Finally, on the advanced options page, select the command prompt option.

Step 4: Once the cmd window has been launched, type the command sfc/ scannnow and then press the Enter key.

Step 5: The user must then wait patiently for the verification process to be completed. Then, to see if the error of making Windows ready is still present, the machine must be rebooted.

Solution 5: Run a startup repair on Windows 10.

Attempting this option may resolve the error by entering the Windows Recovery Environment and using the Startup Repair Feature, which is meant to resolve common computer issues such as those that prevent the computer from loading properly.

Step 1: The user should first boot their PC using USB bootable media.

Step 2: Next, press the Next button.

Step 3: Next, in the lower right corner of the window, click the Repair your machine option.

Follow the instructions below to resolve the loading issue –

Step 1: Select Troubleshoot from the drop-down menu.

Step 2: Next, select Advanced Options from the drop-down menu.

Step 3: Finally, select the Startup repair option.

Step 4: After that, choose your account.

Step 5: Make a password entry.

Step 6: Finally, select the option to continue.

After you’ve completed the steps above, the Startup Repair feature will begin scanning, detecting, and fixing the problem that’s stopping your windows from loading properly.

Solution 6: In Safe Mode, Uninstall a Newly Installed Update

Follow the instructions below to solve this problem –

Step 1: To begin, go to settings, then update and security, and finally, view update history.

Step 2: Then, at the top of the screen, click the remove updates icon.

Step 3: The screen will then display a list of updates.

Step 4: The customer will then see this KB4103721 on the remove windows update screen, which we must uninstall.

Step 5: Restart your computer and log into Windows 10 as usual.

Solution 7: Install Windows from Scratch

Before installing Windows, make a backup of the important files because the installation will erase them. Follow the instructions below to complete a clean Windows 10 installation –

Step 1: Start your computer by booting it from an installation disc or a hard drive.

Step 2: Select your preferred language, time, format, and keyboard.

Step 3: Finally, select the Install Now option and follow the on-screen instructions.

Conclusion

I hope the options listed above assist you in resolving this problem. Shutting down and restarting your computer may potentially assist to resolve the problem. If none of the solutions work, you can seek assistance from the experienced team.

Filed Under: Windows

How To Fix Windows Update Error 0xc1900200

December 19, 2022 By Alex Hep Leave a Comment

Are you attempting to install Windows 10? Is the error 0xc1900200 appearing on your screen?

When you use the Windows Update Assistant application to update from an older version of Windows to Windows 10, you’ll get this problem.

This message appears most frequently when a user upgrades from Windows 7 or Windows 8.1 to Windows 10.

In this case, it appears that each criteria has been met, but the procedure fails to report the appropriate error code at the conclusion.

How To
How To

Windows Update Errors and Their Causes 0xc1900200

Do you have any idea what’s causing the Windows Update 0xc1900200 error? Then read the following tips to see whether a similar problem occurs on your PC as well. The following are the factors that contribute to this error.

Minimum requirements are not met: The appropriate specs are the most basic prerequisite for installing Windows 10.

Windows 10 is a sophisticated operating system that necessitates high-end hardware, therefore it cannot be installed on every computer.

As a result, if you have a machine with low specifications, the installation will fail and an error will appear.

WU component that isn’t working: Are you having problems with one or more Windows Update components? This issue can also be caused by the Glitched WU component.

If you’re having trouble with the same problem, try clearing the Windows Update cache. You can update it manually or with the help of an automated agent.

Insufficient Reserved Partition space: An insufficient quantity of storage in the Reserved Partition can potentially cause the problem.

Because Windows 10’s upgrading agent uses only a single partition, if you don’t have enough space in the Reserved Partition, the machine will not upgrade.

As a result, for proper downloading, it should have adequate room to transfer data freely. This issue could be resolved by increasing the size of your System Reserved Partition. It could be done quickly with the help of a third-party tool.

System File Corruption: Is your computer infected with a virus? Despite the remote possibility, you discover that the problem is caused by corrupted but critical data for your operating system.

This problem can be fixed by using an in-place repair method to refresh every component of the operating system.

How to Fix Windows Update Error 0xc1900200

Here we have listed the solutions to fix Windows Update Errors and Their Causes 0xc1900200. Follow these methods to fix the error.

Method 1: Verifying the Minimum Requirement

You may have already learned that some minimum requirements are required to install Windows 10 on your computer.

As a result, you must determine whether your PC’s specifications are compatible with the upgrade’s needs.

First and foremost, you must go to Microsoft’s official website. Now, from the many options available, select “Get the Anniversary Update now.” It will start downloading a file once you click it.

Run it once the download is complete. The Update Assistant has started, as you can see.
Then, on the next window, click the Update Now icon that has displayed.
After that, you’ll receive a compatibility report.

If there’s an issue, it’ll let you know which parts of your machine aren’t compatible with Windows 10.

If the Windows Update component issue has a green tick on each, it could be the cause of the problem. If this is the case, we recommend reverting to Method 2.

Method 2: Clearing the Cache in Windows Update

Is your PC unable to complete the upgrade using method 1 as well? If this is the case, don’t be concerned.

Numerous people have claimed that option 1 resolves the 0xc1900200 error, but that it causes one or more Windows Update Components to become stuck in limbo.

As a result, the upgrading process will be disrupted. This issue of being stuck in limbo could be resolved by resetting all of the relevant Windows Update components.

In the vast majority of cases, the Windows upgrade was finished automatically as soon as the user performed the steps outlined above.

Do you have any idea how to reset all of the required WU components? Then let me inform you that one of the two methods will accomplish the trick.

You can do manual routing and rely on an elevated CMD prompt in one way, or you may utilise the automated WU agent to fast-forward the entire transaction in the other.

You can take any of the following approaches that you feel most comfortable with.

Using the Automated Agent to Reset the WU Component

To begin, launch your default browser.
Install the Reset Windows Update Agent script from the Microsoft Technet page.

The next step is to wait patiently for the initial download to complete. After that, extract the zip archive with a programme like WinZip, WinRar, or 7zip.

After double-clicking on the ResetWUENG.exe, follow the directions on the screen. This causes your computer to launch the script.

Important: Do you have any programmes running on your computer? Then, before you start it, we recommend that you save any running processes because Windows Update will reset all of its components on its own during this procedure.

After the operation is completed, restart your computer. Then wait for the next startup to finish.

Retry the update process to see whether the error has been resolved. Is the 0xc1900200 error no longer a problem? If not, we recommend attempting Method 3.

All WU Components are Reset Via an Elevated CMD Window

To begin, press the Windows and ‘R’ keys at the same time to bring up the Run dialogue box.
Now you must type ‘cmd’ into the Run box that has just been opened.

After typing ‘cmd’ in the text box, concurrently hit the Ctrl, Shift, and Enter keys.
To grant management benefits, start a command prompt and select Yes in User Account Control.

In the elevated CMD prompt, type the following commands. This is done in order to slow down the execution of critical WU operations. After typing each line, don’t forget to hit Enter.

wuauserv wuauserv wuauserv wuauserv

crypt on the internet

Stop bits for Svcnet

net msiserver halt

Then, when each appropriate component comes to a halt, type the proper commands. After typing each line, don’t forget to hit Enter.

This is done to rename the Catroot2 and SoftwareDistribution folders, which eliminates the possibility of a corrupted OS component interfering with the procedure. The lines below must be typed –

C:Windows/ren/ren/ren/ren/ren/ren/ren/ren/ren

SoftwareDistribution SoftwareDistribution.old

C:WindowsSystem32catroot2 Catroot2.old ren C:WindowsSystem32catroot2 Catroot2.old

Important: The Catroot2 and SoftwareDistribution folders are used to store temporary update files that are currently being used by the Windows update component.

Type the following commands after the Catroot2 and SoftwareDistribution folders have been refreshed.

Because several processes were previously deactivated, such as the Windows Update service, the MSI Installer, the Cryptographic service, the BITS service, and so on, this step re-enables them.

wuauserv wuauserv wuauserv wuauserv

start cryptSvc.net

start bits on the internet

start msiserver with net

Finally, reboot your computer. It will now perform the rest of the starting routine on its own.

As soon as the booting process is complete, repeat the upgrade procedure. Check to see if the error has been resolved and your PC can complete the upgrade.

Your problems will be solved if you properly follow all of the instructions. If the problem hasn’t been solved, move on to Method 3.

Method 3: Increasing the Size of the Reserved Partition

As you’ve read, a sufficient amount of reserved partition space is required. Thus, in case, there is not enough space on your reserved partition, it will generate a particular issue.

Not only the procedure fails in such a case, but also the 0xc1900200 error is issued due to space-related concerns.

Are you a Windows user? Then, you can get rid of this issue in a similar approach as most of the people have done to solve the problem.

The problem can be rectified by obtaining a 3rd party utility which can enlarge the reserved system partition up to 350 MB.

In most of the cases, the issue stopped when the user completed this operation. Basically, it is possible in two distinct situations.

Using Device Manager

Step 1: First of all, press Windows and ‘R’ keys simultaneously. This will open the Run window.

Step 2: Once the run window is opened, type diskmgmt.msc in it.

Step 3: What you have to do next is to select the OK button which will open up the Device Manager.

Step 4: Now, see different partitions in the Partition Map column after choosing the C:\ Drive. You will see that the first position of it is a 100 MB partition, which contains System, Active, and Primary Partition.

Step 5: Further, right-Click on the first partition.

Step 6: Later on, transform your drive letters and paths by selecting Add and Y.

Step 7: What you need to do now is to type cmd after choosing Start.

Step 8: Moreover, select Run as administrator after right-clicking on cmd.

Step 9: Once done, you need to type the following certain commands in command prompt.

takeown /f . /r /d y

icacls . /grant administrators:F /t <see note below>

attrib -h -s -r bootmgr

Important: You need to use your username in case of the icacls command. The username could be found out by typing whoami in the command prompt window.

What you need to do next is to press Windows and ‘R’ keys simultaneously. Now, choose the Y: Drive to open it. Further, select it to show your entire hidden files and folders.

Then, use SHIFT + DELETE for deleting the entire languages except for en-US after going to the Boot folder. Finally, empty the recycle bin.

Finally, type the respective commands in the same Command Prompt window.

For windows 8 and above, you need to type –

chkdsk Y: /F /X /sdcleanup /L:5000

For Windows 7, you need to type:

chkdsk Y: /F /X /L:5000

The NTFS log will now be trimmed to 5MB. It will clear a large amount of area in order to complete the process’s installation.

Return to diskmgmt.msc after the installation is complete to remove the drive letter. It’ll finish the boot partition.

Method 3: Conduct a Repair Installation

Is neither of the previous two solutions resolving your 0xc1900200 error? You haven’t been able to upgrade Windows Upgrade Assistant yet? Then you should definitely give this strategy a shot.

In this instance, there’s a probability that the user is dealing with some form of system corruption. This corruption problem will not be resolved in a satisfactory manner.

Is this a problem you’re having as well? This problem can be resolved by resetting any Windows components that are attempting to trigger the error message.

You can accomplish it the most cost-effective method by doing an in-place upgrade. A repair install essentially fixes the majority of system file corruption issues.

It substitutes all Windows components, such as booting-related processes, and so on. The main advantage is that each component may be replaced without damaging a person’s personal files.

As a result, you can do it without worry of losing your data in games, personal media, apps, and even a few user preferences.

When executing a repair install, you must follow the correct procedures. After the procedure is completed, you must attempt the upgrade process to see if you are able to update to Windows 10 without experiencing any issues.

Conclusion

We hope that the options listed above were helpful in resolving your problem. In most circumstances, the problem is caused by insufficient storage in the reserved partition or incorrect requirements.

If this is not the case, the many procedures listed above will undoubtedly solve your problem.

Filed Under: Windows

Sppextcomobjpatcher.exe – What Is It, Is It Safe and More

December 16, 2022 By Alex Hep Leave a Comment

Now everyone is using the internet in their ways and for their purposes. In simple Internet is a network of networks. Windows, which is developed and introduced by Microsoft, is an operating system, and it includes a component called file systems. sppextcomobjpatcher.exe is such a file system. If a person is using Windows, at that time, the antivirus in that person’s computer found is the file which is named as sppextcomobjpatcher.exe. The location of that file is like mentioned below:

C:\Windows\setup\scripts\win32\sppExtcomobjpatcher

OR

C:\Windows\setup\scripts\x64\sppExtcomobjpatcher

The person can also notice that this file (sppextcomobjpatcher.exe) runs in the task manager very well. Because of this, many people are worried and confused about whether this file is harmful or secure.

What is sppextcomobjpatcher.exe?

This is a part of the operating system that is not legal and connected to key management service (KMS), licensing for Microsoft products. So, in simple, we can say that this file is used to activate Microsoft products and the user’s operating system.

what is sppextcomobjpatcher.exe - is it safe

Remember: First, we have to understand that sppextcomobjpatcher.exe is not an official file. As suggested earlier, this file is used to activate Windows and Microsoft products, not legally. When you see this in your system, it shows that the Windows which you are using is pirated. We know that Microsoft does not allow pirated copies of Windows or other products to work on its system. You have seen that the sppextcomobjpatcher.exe file has been flagged on your antivirus. This happens because of the above statement.

Is sppextcomobjpatcher.exe Safe?

At first, the user has to know that the file will be safe or will not be safe depends on where it is got. Another thing is that any person can create this file. For example, a virus can create this file and can be provided to pirated Windows for free. This is why we suggested that the file can be harmful or harmless.

We suggest to every people that please don’t use pirated operating systems. If you saw this file on your PC recently. You must return it. And another solution is that if you are using genuine Windows, and only you can see this file, you must scan your system with antivirus software.

The choice is yours. This file will be flagged by the majority of antivirus software because it is illegal. The user can continue using this when he or she finds no suspicious activity, and also, the user is accustomed to using such versions.

This is about the file sppextcomobjpatcher.exe and its safety. We must give preference to the users’ safety. Sppextcomobjpatcher is also known as Auto KMS. This process must be carefully treated. We are sharing additional information because this file may be a part of some malware that sends the information from one computer to the other with any wrong intentions.

Here are some situations in which the sppextcomobjpatcher.exe got inserted in your pc (Also suggested earlier).

  • The user has deliberately installed the file with some intentions.
  • When you purchased a system with the sppextcomobjpatcher.exe already installed, but the user is unaware of it.
  • Has been reached your computer through any malware.

For these problems, solutions are also there:

  • Use strong passwords.
  • Use two-factor authentication.
  • Antimalware software is beneficial.
  • Avoid using cracked software.

sppextcomobjpatcher.exe is a file with no information about who developed it. It is an unknown file. This file has no Windows visible to us. This can monitor programs and applications. In our computer security task manager examines this file. An Antimalware tool tells what this file is doing on our PC.

Sppextcomobjpatcher is not a nefarious piece of software. Antimalware is well known, and it also helps us to know if the sppextcomobjpatcher is the reason for the slow running of the PC and also displaying many advertisements. Anti-malware is good protection for the PC. Antimalware also helps to eliminate threats, trojans, spyware, bugs, etc. That are affected by the computer.

Conclusion

In this modern era, people look more at fastness. Even if it is in the case of technology they are looking the fastness of a computer in its working and this fastness is also spotted. For attaining that fastness your computer must be clean inside and outside. Many files cause the slow working of the computer. Sppextcomobjpatcher.exe is such a file. And this must be detected. Then only will be the problems are resolved. We remind all the users about the Sppextcomobjpatcher.exe file. And before all, we suggest whatever we are using use it wisely.

Filed Under: Windows

Windows Key Not Working on Windows 10 [SOLVED]

December 16, 2022 By Alex Hep Leave a Comment

In the digital world, Keyboard whether it is our computer system or our phone we can’t type anything without a keyboard, it helps us to write. The keyboard is not only used in typing but also it has many other uses like keys that are used as a shortcut for different software. From all the key collections there’s a small key with a window logo is called Windows key, which is built to execute the Windows operating system.

Generally, it is placed between the Alt and Ctrl button of the keyboard on the left side with a Microsoft logo on it! If you generally press this key you will be navigated to the start menu also it provides the shortcut of many window functions when it is used or pressed with other keys simultaneously. But it became a problem when this key does not work properly due to some errors and in this article, you can find how to overcome them.

Windows Key Not Working

How to Fix Windows Key Not Working error on Windows 10

Facing trouble while using your system makes us irritating. Many users reported that they are unable to use the Windows key properly. But nothing to worry about as in this article we have come up with 10 solutions for this particular Windows key issue. So scroll down to get ten successful methods for this issue are :

Read Also:

  1. ERR_CACHE_MISS
  2. ERR_EMPTY_RESPONSE

Method 1 – Change Your Registry

It had been reported by many users that they faced such an error with the Windows key which is caused by the problem with the registry. Well, there’s a caution that you need to be very careful while fixing this error as it may affect your hard drive or your PC. So it is a safe play if you back up your registry as if there’s high damage in registry Windows 10 file explorer will not open so for this you can export your registry and can backup them. This is a simple method to fix this type of error. For this :

  1. Open task manager and in the new window go to file. There you need to run a new task.
  2. In the new run command box type “regedit” and click OK or hit the enter button.
  3. In the appeared window go to the left panel and elect HKEY_LOCAL_MACHINE\SYSTEM\CurrentControlSet\Control\Keyboard layout button.
  4. Now you need to expand the layout key and search for Snapcode Map registry entry. After finding you need to remove or delete it.
  5. Now close and exit Registry Editor and give a restart to your system.

Now check if the problem persists or not. Well, some users may unable to find the Snapcode Map registry entry, because it might not be there on their computer and for that, they can apply other methods mentioned below.

Method 2 – Perform Malware and Virus Scan

Contagious virus and undesirable malware can harm your system as well as it can lead to hard drive problems which can trigger Windows key error Windows 10. Well, this method can totally disable the Windows key so to get a confirmation on this issue always does a full system scan. Still, except this, you can detect the presence of harmful software in your system by downloading and running malware removal tools like Malwarebytes and Windows defender. For this follow these steps :

  1. Go to the start menu and hit the settings button.
  2. Opt for Update and Security. Then you will find the Windows defender option and click on it.
  3. On the left side, you will see the shield type icon and navigate to that.
  4. Then firstly click on the advanced scan and then select a full scan.

Now after removing harmful software from your system, check if the Windows key is working properly or not. If not scroll down to get other methods.

Method 3 – Disable the Gaming Mode

Well, this segment is applicable for those who play games and uses a gaming keyboard that has been designed and developed by developers where some keys will be disabled while playing games so that it can’t interrupt your gaming session. But this advantage can become a disadvantage when it triggers this issue because of having game mode on the gaming keyboard.

Developers planned this so that you can enjoy a hassle free game because as an example, mistakenly pressing Windows key while playing games will minimize your game and will navigate to the start menu. If you are a gamer then you can feel how does it seem when such thing happens while playing online with friend. So, after thinking about all these measures developers developed game mode and as a result gaming keyboard supports game mode.

Nevertheless, if you are using a gaming keyboard and also you are facing Windows key not working error in your personal computer, check if the game mode is on or off.

Well, there’s some exception like Apex M800 keyboard whose gaming mode is in hidden state and here to disable you need to hold the SteelSeries button and then hit the Windows key which will off this facility.  Still, it is recommended to look at your keyboard as different keyboard have different methods to disable this function and you need to take step accordingly.

Method 4 – Check out the Win Lock Button

Win Lock Button is developed by developers to disable the win key present on your keyboard and there are some keyboards who have Win Lock Button. In many gaming keyboards, it contains this Win Lock Button in order to give you a hassle-free game session so that you can not exit from your game accidentally to your desktop or home screen. So you need to check your keyboard for that whether it contains Win Lock Button or not. If it contains then it is for you!

Well, you could easily locate this Win Lock Button on your keyboard near the right control button. After getting this fixed Win Lock Button you need to press it to make your Windows key start working again so you can easily troubleshoot this Windows key not working error for this reason easily.

Method 5 – Create a New Account

It has been reported by some users that sometimes this error of Windows 10 can be shooted by some easy steps. You can overcome this problem by creating a new user account, for this you can go through these steps accordingly :

  1. Go to Settings and click on the account section.
  2. Now, select the option labeled Family and other people.
  3. Under this category, you will find the other people labeled option and now click on Add someone else to this PC.
  4. Now search for the “I don’t have this person’s sign-in information” option.
  5. Now select the option “Add a user without a Microsoft account.”
  6. Name your new user account and finally click on the next button to finish the process.

After creating this new user account sign out from your previous account and sign in to your new user account. Now check if the Windows key is going without any problem or the problem is still persisting. Now if the Windows key is working properly on the new user account means the error of the Windows key is not rising anymore this means in your PC this software is causing the issue. So now once it is settled then start moving your files and folders to your new user account and start treating it as your admin account. Well, if this method doesn’t work for you, try other methods!

Method 6 – Perform a System File Checker Scan

Beyond those causes, corrupted Windows 10 is another one. This issue can occur if the Windows 10 which is installed in your computer is corrupted and this can head towards stopping certain functions work properly in your Windows 10. To troubleshoot this issue you can go through a System File Checker (SFC). For this follow the following steps :

  1. Go to task manager and opt for the File option then click on Run new task.
  2. Under this category type cmd and make sure the box is checked which is situated beside the Create this task with admin privileges.
  3. Now new command prompt window will appear and there you need to type sfc /scannow and press Enter key.
  4. Now wait until your scan gets done! This scan will check about your Windows 10 installation.
  5. Now restart your computer once everything is done and check.

After restarting check if the problem fixed or not. If this problem persists, navigate to the command prompt and type  DISM /Online /Cleanup-Image /RestoreHealth command and check for this problem’s existence in your system till now. If yea then scrolls down.

Method 7 – Uninstall Bad Keyboard Drivers

Uninstalling the Bad Keyboard driver can make a way to fix it. For this follow this step:

  1. Navigate to the Start menu and opt for Run or press Ctrl + Shift + Esc at a time to open task manager. Now from there go to the file option and select run a new task.
  2. In the command box type devmgmt.msc to open a new window of the device manager and hit the enter button to execute it.
  3. You will see a keyboard section appear and you need to expand it first and apply a right-click on current keyboard drivers and opt for uninstalling device labeled option.
  4. Now to remove the faulty drivers, select the option uninstall or yes from the upcoming warning message.
  5. For the USB keyboard, unplug it first and again plug it or you can simply give a restart to your computer so that Windows can reinstall the drivers automatically. If there’s any problem regarding USB ports you need to fix them accordingly.
  6. Now check if the Windows key is working properly or not.

If it is not working properly then go for the other methods.

Method 8 – Use PowerShell Command

PowerShell Command line tool can be useful for this particular issue which can be enabled to remove Windows 10 components. So sometimes with this method, you can shoot this problem but it is recommended here to be careful as carelessness can be harmful to your computer and can damage Windows 10 system. This PowerShell Command can made the unwanted result of your computer system so it is recommended to create a new System Restore Point which you can use to restore if there anything wrong happen to Windows 10 computer system. To apply this step follow accordingly :

  1. Go to the start menu and open run or press Ctrl + Shift + Esc together to open task manager.
  2. Under the task manager category you will see the file option and from there click on Run new task.
  3. Then go to the PowerShell and then make sure there’s a checkmark on the option “Create this task with administrative privileges.” and hit enter or press the OK button.
  4. Under PowerShell category in the command box type Get-AppXPackage –AllUsers | For each {Add-AppxPackage –DisableDevelopmentMode –Register “$($_.InstallLocation)AppXManifest.xml”}. And press the Enter button from your keyboard.
  5. With this method, after this Windows key should work properly.

If this method doesn’t work for you then it could be due to other problems in the system. Scroll down to know and fix them.

Method 9 – Restart Your Windows or File Explorer

With this method, you also can overcome this problem as the Windows user interface can be controlled by file explorer. In this strategy easily you can solve this by giving a restart to your file explorer or Windows on your PC. For this:

  1. From your keyboard press Ctrl + Alt + Del keys simultaneously and navigate to task manager.
  2. Go to gab labeled Process and opt for Explorer in the window and hit a right-click on this. Now click on the end task option.
  3. Again now click on the file named option and select Run new task.
  4. Now type “explorer.exe” on the box and press the Enter key to execute it.
  5. Now check if the error of the Windows key persists or not.

Method 10 – Switch off the Filter Keys

Filter Keys are those by whose instructions your keyboard can ignore or make the system slow down to repeated keystrokes and adjust the repeat rate. So, if they are in on mode in your PC it can cause many problems and from the Windows key not working error is another. Filter Keys can also affect Windows key but on some certain keyboards. Furthermore, it’s error can result in Low memory issue in Windows 10. So to turn it off you can follow those steps :

  1. Navigate to the start menu and go to the settings.
  2. On the settings page, a bit of scrolling down can show you the option Ease of Access and click on it.
  3. Then you will find the keyboard tab on the left side there and click on it.
  4. Again scroll down to opt for filter Keys and then turn them off.

Restart your computer and check if it is running properly.

Read Also:

  1. Taskeng.exe
  2. ERR_SSL_VERSION_INTERFERENCE

Conclusion

Hopefully, you have successfully able to fix Windows Key not working error. But if none of them worked for you then it could be due to faulty hardware or electric or mechanical problems of your keyboard which can be sorted either by replace or by repairing. Hope this article helped you. Don’t hesitate to share which methods worked for you. Till then good luck!

Filed Under: Windows

MSVCR120.dll is Missing on Windows 7, 8 and 10

December 15, 2022 By Alex Hep Leave a Comment

Is your computer showing an MSVCR120.dll is Missing error while you are trying to open or run any particular application or game? If yes, then don’t worry about this as this is one of the most common errors which triggers on Windows 7, 8, and 10. But before heading towards its solution, you need to know what is this MSVCR120.dll is missing error and why it occurs.

MSVCR120.dll is used for extracting several resources for third-party applications that are linked to the C++ programming language. This error occurs when programs don’t find the required files to launch any program in this language. An incomplete MSVCR120.dll file can result in several types of issues while launching games or other programs.

MSVCR120.dll is Missing

Well, if you are encountering this error, don’t worry because here we are providing some most effective methods which can easily Fix this MSVCR120.dll missing error. For better and prompt results, you can start with the first solution and can go down accordingly. Don’t forget to run the application after executing each method. Well, these methods worked for almost all versions of Windows.

Solution 1: Running System File Checker

If you are facing the error which shows “MSVCR120.dll is Missing”, you may need to look for the detection of the presence of corrupted files in your system. Microsoft Windows offers System File Checker or SFC, which one can find in any version starting from Windows 98. Undoubtedly it is a very useful tool to detect any problem in your system due to corrupted files present in Windows.

You can run SFC for your problem and check if the problem is gone. While running SFC, you will encounter anyone these three responses :

  • Windows resource protection found corrupt files and repaired them.
  • Windows didn’t find any integrity violations.
  • Windows resource protection found corrupt files but was unable to fix some (or all) of them.
  1. To open the run application, hit Windows “key +R” together from your keyboard and type “taskmgr” there, and after hitting the Enter, button task manager will launch.
  2. Go to the top left side of the window to click on the File option present there, and from all options, select “Run new task”.
  3. In the dialogue box type “PowerShell” and opt for the option stating ” create this task with administrative privilege”.
  4. In the Windows PowerShell type “sfc /scannow” followed by hitting the Enter key. Now your system will scan all Windows files to trace the presence of corrupted files, and this process may take some time.
  5. After that, if any statement comes which states that an error has been found but was unable to fix them, then you need to type “sfc /verifyonly” and wait until the process completes.
  6. If it still fails to repair that file, you need to run the following command in PowerShell, “DISM/Online/Cleanup-Image/RestoreHealth”. In this process, the corrupt file will be downloaded and replaced with the corrupted one. Don’t cancel this procedure while running, and the time consumption may vary with your internet connectivity.

If using the above mentioned method, the detected error is fixed then restart your system and check if the problem persists after reinstalling the application.

Solution 2: Downloading MySQL Installer Community

MySQL is SQL(Structured Query Language) based, relational database management system. Well, it is highly recommended that if you are encountering any problems while running various MySQL applications (like – MySQL Workbench, etc.) you need to install MySQL Installer Community on your system.

This installed tool will help you to detect those Visual Studio components which are lacking in your system and accordingly it will launch a Visual Studio minimal components Installer and will fill the gaps. While downloading the application, make sure you are downloading it from its official website, that is, the official MySQL website. Once you are done with this process check if you are still encountering MSVCR120.dll is missing error or not.

Solution 3: Reinstalling the Visual C++ Redistributable Packages

msvcr120.dll is one of the most important files for Windows OS, without which one can not be able to launch games. So to overcome this, you need to install the whole redistributable package after downloading this. It is recommended not to download .dll files from the internet and from non-official websites in order to protect your system from malware and viruses.

  1. Navigate to official Microsoft downloading.
  2. After selecting your preferred language click on the download button.
  3. From there, choose the option “vredist_x64.exe” followed by pressing next. Then the downloading will start, and then you need to save the file in an attainable location, and followed by this run the exe file in your system.
  4. After accomplishing the installation you need to restart your system and check for the problem.

For 64 bit: vredist_x64.exe and vredist_x86.exe( both can be used)

For 32 bit: vredist_x86.exe

Solution 4: Scanning for Virus

Infecting by Virus can lead to many problems in your systems, including making your computer slow down to missing files and many more, and unfortunately, .dll files are one of the most famous hosts for various viruses and malware that can attack your computer.

While using your system, if you encounter any suspicious activities made by your system, you should scan your system at your earliest convenience to trace the presence of malware and viruses. To perform this step, you can use the antivirus you have on your system, or you can use Windows defender instead of it.

  1. Firstly Navigate to the search bar at the start menu by hitting Windows + S together. Then you need to type “Windows Defender” and click on the first result you face.
  2. On the opened window, you will see a scan option on the right side and choose the full scan option followed by clicking on the scan option. By this process, Windows will check all files individually, so this process will take some time.
  3. If any malware or virus is detected by your system, it will repair that by removing that malware from your system and allow your system to restart before running the application again. Now check if the problem is still there or not.

Instead of Windows Defender, you can use Microsoft safety scanner as it’s the latest version that has this capabilities to detect the presence of viruses and check if it finds any odds.

Solution 5: Install both VC Redist Packages

Installation of both VC Redist Packages or Visual C++ redistributable packages can help you to get out of this problem. For this, you need to reinstall all of your VC Redist Packages of your system. To make it work properly, you need to install both the version of the application for 32-bit and 64-bit. With the following mentioned steps, you can easily overcome this problem related to this issue by uninstalling the prior version of Vac Redist Packages first and then by reinstalling VC Redist Packages again.

  1. Press the “Windows + R” key from your keyboard to open the run dialog box.
  2. In the opened dialog box type “appwiz.cpl” and hit the enter key from your keyboard to open the app management Windows.
  3. In the current open led window scroll down to get the option labeled “Visual C++ Redistributable” application and click on it.
  4. Now choose the “Uninstall” option from the list and then go with the on-screen instructions to remove that application from your system.
  5. Follow these same steps for all other Software installations.
  6. Now you need to navigate to the Microsoft website and need to download the following installations one by one.
  • Microsoft Visual C++ Redistributable 2005 64-bit+ 32-bit
  • Microsoft Visual C++ 2008 Redistributable Package (x64)
  • Microsoft Visual C++ 2008 Redistributable Package (x86)
  • Microsoft Visual C++ 2010 Redistributable Package (x64)
  • Microsoft Visual C++ 2010 Redistributable Package (x86)
  • Visual C++ Redistributable Packages for Visual Studio 2013 32 bit+64 bit
  • Visual C++ Redistributable for Visual Studio 2015
  1. Once the downloading of all these installations are over, you need to install them one by one accordingly on your computer by executing the setup files.
  2. Once all installations are done, then check if still any problems persist or not.

 Solution 6: Installing Windows Updates

You may encounter this problem due to insufficient Windows updates, which means there may be some updates available for your OS, and it hasn’t applied yet to your computer. As a result, you may face this problem. With these mentioned steps, you can easily check it out if there is any update available.

  1. Press “Windows + I” together from your keyboard to open Settings, and from there, opt for the “Updates and Security” Option.
  2. In the newly opened window, opt for the Update section, and from the left panel, select the “Windows update” labeled option and hit the “check for updates” option.
  3. After checking for updates, Windows will automatically install it on your computer if there are any updates.
  4. Once the installation of the Windows is done, check if that problem exists or not.

Solution 7: Reinstalling Application

It has been reported that reinstalling applications can resolve the problem. If the problem you are facing is centric to only a particular application or a game that is not launching properly, it could occur due to its improper installation. Its installation may be done properly to run efficiently. If you have applied all the above-mentioned methods and still if the problem persists, then you should reinstall that application or game which is showing problems.

For this, you need to uninstall that application first and then download that application from a source to install it again. While downloading that application, again make sure from the source you are downloading is authentic and reliable.

Conclusion

All these mentioned methods are reported as very effective for this MSVCR120.dll is Missing error on Windows. You can apply these steps one by one and after each time, check if the MSVCR120.dll is Missing error solved. If still, you are encountering this MSVCR120.dll is Missing error, then try the next one. You try them according to this above-mentioned order. I hope you find this article helpful. Good luck!

Filed Under: Windows

  • 1
  • 2
  • 3
  • Next Page »

Recent Post

  • 13 Best Sites Like MangaPark To Read Manga Online In 2022
  • Top 7 Alternatives of CricHD Live Streaming
  • 5 Best Alternatives to Flixtor
  • 9 Best Demonoid Alternative
  • 8 Best VIPLeague Alternatives In 2022
  • 15 Stream2Watch Alternatives for Watching Sports
  • 13 Best Sites Like AnimeFreak You Can Use To Watch Anime
  • 10 Best Movie4K Alternatives for Movie Streaming
  • Error Code 0x80070570 – Windows Cannot Install Required File
  • ERR_CONNECTION_RESET Error in Chrome
  • Application Error 0xc0000005

Categories

  • Alternatives
  • Entertainment
  • Errors
  • Gaming
  • How To
  • Internet
  • Tools
  • Windows
Copyright 2019