Possibly Windows is the most popular OS for our personal computer and Windows 10 under Windows NT family is a series of OS developed by Microsoft. Many Windows 10 series users reported that while updating or installing any latest windows 10 version,
They faced an error showing Error Code 0x8007000 and this error occurs frequently in windows 10. Facing any trouble in the system is another annoying issue to deal with this but now calm down because here you can find to solve this particular issue.
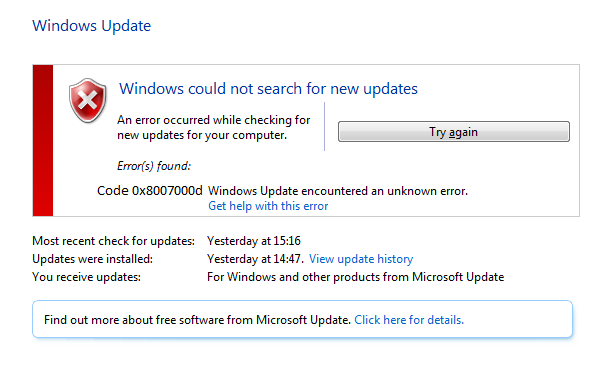
Understanding Error 0x8007000D: What Is It?
Error code 0x8007000D is a Windows Update error that typically occurs when attempting to install or update Windows components or applications. It signifies an issue with the system’s ability to read or process files correctly, often resulting in a failed installation or update process.
Read Also:
Common Causes of Error 0x8007000D in Windows 10
Several factors can trigger error code 0x8007000D in a Windows 10 system:
- Corrupted System Files:
- Damage or corruption in essential system files can lead to this error, preventing proper file processing.
- Windows Update Issues:
- Problems with the Windows Update service or its components can result in the inability to install updates, leading to this error.
- Incomplete Downloads:
- Incomplete or interrupted downloads of Windows updates or application installations can trigger error 0x8007000D.
- Registry Errors:
- Issues within the Windows Registry, such as invalid entries or keys, can hinder file processing and cause this error.
- Software Conflicts:
- Incompatible or conflicting software applications, including antivirus or security software, can interfere with the installation process.
How to Fix Windows Error Code 0x8007000D
This article can help you out whenever you encounter Error Code 0x8007000D in Windows. Those below-mentioned strategies worked for many Windows users to overcome such issues. You can try those below-mentioned solutions to troubleshoot this issue on windows.
Just as a reminder, check all commands after typing whether they are proper or not. Improper commands can lead to other results. So while typing the commands be cautious.
Solution 1: Run System File Checker
This method is one of the most popular. For this:
- Navigate to the Windows search option and type cmd there and press the enter key from your keyboard to open Command Prompt.
- Hit a right-click in the Command Prompt and select run as administrator.
- Now run the under mentioned command sequentially and hit a enter after each command. They are-
WSReset.exe
dism /online /cleanup-image /restorehealth
dism /online /cleanup-image /StartComponentCleanup
sfc /scannow
PowersShell
Get-AppXPackage -AllUsers |Where-Object{$_.InstallLocation -like“*SystemApps*”} | Foreach {Add-AppxPackage -DisableDevelopmentMode -Register “$($_.InstallLocation)\AppXManifest.xml”}
- After entering all command , restart your system and check if the problem still exist or not.
If still you are facing the same trouble then scroll down and apply other methods.
Solution 2: Try Group Policy Editor
If the previous method doesn’t work for then try this one. For this :
- Press Windows key + R from your keyboard and open the run command prompt.
- In the opened run box type services.msc followed by hitting the enter key.
- Select computer configuration from there and then go with Administrative templates.
- Now, select system and hit a double – click on the specify settings regarding the optional component installation and component repair.
- Opt for Enable option and contact windows Update.
- Now click Ok.
- After this restart your personal computer.
Now check if it is running properly or still the issue is persisting. If still it’s showing then follow other methods.
Solution 3: Run the DISM tool
DISM or Deployment Image Servicing and Management tool is a built-in tool which is fixes all possible potential problems related to corrupted files. For this :
- Hit a right-click on the Window logo and select Command Prompt (Admin) from there.
- In the command, box type the following command and hit the enter button.
DISM.exe /Online /Cleanup-image /Scanhealth
DISM.exe /Online /Cleanup-image /Restorehealth
- Now give a reboot to your system and check if this issue exists or not.
If still, this problem is there in your system then scroll down.
Solution 4: Manually Reset the Windows Update Components
It has been reported by some users that giving a reset to Windows Update Components can solve this issue. To apply this method follow those steps :
- Press Windows + x from the keyboard and a menu will appear in the lower-left corner. From there, select Command Prompt (Admin).
- After opening type those command one by one and to execute them hit the enter button
net stop bitsnet stop wuauserv
net stop appidsvc
net stop cryptsvc
- Now, to delete the qmgr*.dat., type this command in the command box and press enter:
del “%ALLUSERSPROFILE%\Application Data\Microsoft\Network\Downloader\qmgr*.dat
- Now go to the System32 folder and there you need to register the BITS files and Windows update files.
- Now in Command prompt type cd /d %windir%\system32 and press enter the command to run it.
- Now run the following command by pressing enter to run it one by one for Resetting the above mentioned BITS along with Windows Update files
regsvr32.exe atl.dll
regsvr32.exe urlmon.dll
regsvr32.exe mshtml.dll
regsvr32.exe shdocvw.dll
regsvr32.exe browseui.dll
regsvr32.exe jscript.dll
regsvr32.exe vbscript.dll
regsvr32.exe scrrun.dll
regsvr32.exe msxml.dll
regsvr32.exe msxml3.dll
regsvr32.exe msxml6.dll
regsvr32.exe actxprxy.dll
regsvr32.exe softpub.dll
regsvr32.exe wintrust.dll
regsvr32.exe dssenh.dll
regsvr32.exe rsaenh.dll
regsvr32.exe gpkcsp.dll
regsvr32.exe sccbase.dll
regsvr32.exe slbcsp.dll
regsvr32.exe cryptdlg.dll
regsvr32.exe oleaut32.dll
regsvr32.exe ole32.dll
regsvr32.exe shell32.dll
regsvr32.exe initpki.dll
regsvr32.exe wuapi.dll
regsvr32.exe wuaueng.dll
regsvr32.exe wuaueng1.dll
regsvr32.exe wucltui.dll
regsvr32.exe wups.dll
regsvr32.exe wups2.dll
regsvr32.exe wuweb.dll
regsvr32.exe qmgr.dll
regsvr32.exe qmgrprxy.dll
regsvr32.exe wucltux.dll
regsvr32.exe muweb.dll
regsvr32.exe wuwebv.dll
- Now in the command prompt, type “netsh winsock reset” followed by pressing enter, which will reset Winsock.
- Now type netsh winhttp reset proxy in the command box and hit enter key to reset the proxy.
- Type the following command one by one with hitting enter after each to reboot the service which you have stopped earlier.
net start bits
net start wuauserv
net start appidsvc
net start cryptsvc
- Now to check if this problem still exists or not you need to restart your system.
If still this problem exist go with other methods.
Solution 5: Delete Everything in SoftwareDistribution Folder
If the above methods don’t work for you, you can go with this one and for this:
- Open the run command prompt by hitting Windows and R and type “%systemroot%\SoftwareDistribution\Download” there followed by hitting the enter button.
- With Ctrl+A select everything inside of the download folder.
- Delete them by delete key or by selecting delete.
- Check the pop up which results in the action.
- After that delete everything from the recycle bin and give a restart to your PC for saving changes.
Now try to update the windows and this time you may not get this error again. But still, if this persists apply the next method
Solution 6: Use Group Policy Editor
When all methods go in vain apply this one. For this:
- Firstly, press Windows + R to open Command Prompt.
- There type gpedit.msc and press the enter key.
- Opt for Computer Configuration followed by Administrative Templates.
- The select system from there.
- For optional component installation options and component repair options, you need to double click on the specified settings.
- Opt for Enable option and select enabled. And select contact Windows Update directly.
- Hit on the ok button
- Now restart your system and restart the update process.
Read Also:
- Steam Missing File Privileges
- ERR_SSL_VERSION_INTERFERENCE
- Digital TV Tuner Device Registration Application
Conclusion
Follow steps accordingly and go for the methods sequentially to get a fruitful result in a quick response. Nevertheless, troubleshooting can be done easily. Hope this article helps you and do not forget to let us know which method worked for you to overcome this error. Till then good luck!
Leave a Reply